Pages

Showing posts with label DIY. Show all posts

Saturday, September 29, 2012

Do this: Make a hot-ass chalkboard

 Easy and cheap (just like your mom). Just kidding (unless your mom is a hobag).

Here's what you do:
1. Go to a thrift store (Goodwill, Salvation Army, whatever weird stuff they have out West)
2. Buy an ugly piece of art with a frame you don't want to set on fire
3. Pop out ugly art (If it's stapled in, just bend back the staples without pulling them out. This is important)
4. If art is matted, turn it around--you will use the back. If it's not matted, you're good to go.
5. Get some chalkboard paint (spray or in a can). Paint several layers of chalkboard paint and let dry.
6. Pop that bitch back in the frame (bend staples back so they hold in your new chalkboard).
7. Prime the chalkboard (this is important, too). To do this, take a piece of chalk and rub it all over the chalkboard. Make sure the whole thing is covered with chalk. Then use an eraser/paper towel to wipe it off.
8. Write, draw, doodle, whatever on your chalkboard. I prefer chalkboard markers.
9. ????
10. PROFIT! (That's a South Park Underpants Gnomes reference for those of you who don't get it...)

You're done. Do this as many times as you need to fill your home with chalkboards so you sneeze on the dust and look like your hair is white when really it's brown with maybe some grey in there. Or stop when you're ahead and hang it in your office because your soul is slowly being crushed by the bureaucracy at your corporate job and you need something to remind you that you are creative and not a robot. Just me?

I plan on changing out my quote every so often. I had to start with my favorite Henry David Thoreau quote, from Walking. It actually reads, "In short, all good things are wild and free," but I like the abbreviated version.

So make this hotness. All in all, it cost me about $3.00 since I already had the chalkboard paint and chalkboard markers.

Tuesday, June 30, 2009

Another before and after!

I've been trying to find a cute and functional way to organize my jewelry supplies, and I think I've finally found the solution! My mom gave me a couple of lazy Susans (aka, turntables), and I thought that pairing them with some containers to hold my beads and tools seemed like a good idea. I mod podged them with some gorgeous Snow + Graham wrapping papers, and put my containers of beads on top. Perfect! Here are the pics, I hope you enjoy:


I also mod podged some cans to match so now I have coordinating pen/pencil/brush holders!Yay Mod Podge! Yes, I know they're lumpy and bubbly, but this is only my second foray into the world of Mod Podge, so I'm still learning...

Sweet tags for a sweet baby!

I made these tags for my new baby cousin Emmy, who is a-dorable! I'm hoping her mommy can use them to label Emmy's stuff with them. I love giving handmade gifts, but unfortunately Emmy doesn't have a lot of use for jewelry right now, so maybe she'll get more use out of these! Anyway, here they are! If you know any babies named Emmy please feel free to print them out on cardstock and use them!

Wednesday, June 24, 2009

DIY Display Fun

I found an awesome DIY necklace display tutorial over at Stella + Hodge, the blog of a fellow Etsian (you can visit her shop here). She tweaked it from another tutorial she found, and made it even better! You can see the finished product here:

Image via Stella + Hodge

Cool, huh? I'm going to try it out as soon as I get some free time (so probably never). I love the pattern she used on hers, and I just so happen to have some fabulous Snow + Graham papers laying around...maybe one day I'll have a spare couple of minutes to whip one up. If I do ever get around to making it, I will be sure to post pics!

It's almost Friday!!

Thursday, June 18, 2009

Inspiration!

I found a link to a post on Junk Market Style via Curbly.com, one of my fave DIY sites. I had never heard of the site, but I can tell you it is already bookmarked! Before I even got to the second page, I saw a fabulous desk redo that I had to share.

Sue Whitney revamped her high school daughter's desk with (of course) some cool flea market finds. She has some great tips and photographs on upcycling a damaged desk protector using vintage wallpaper. Please click here to read the whole post. I'll leave you with some images of the "after" loveliness.


Tuesday, April 28, 2009

Ugh...the Craft Room

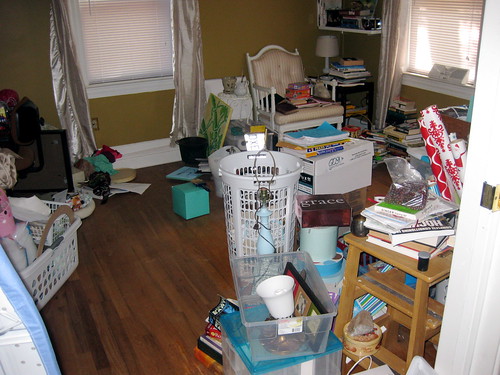
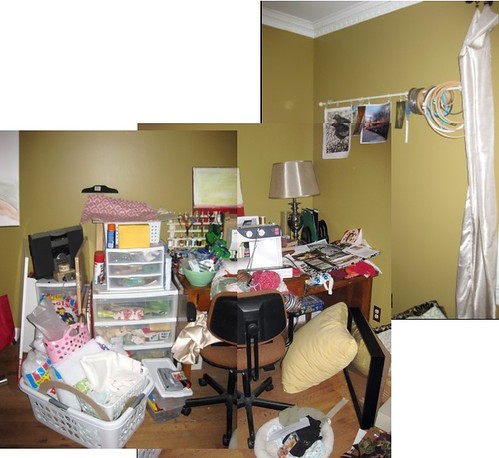
As promised, here are pictures of the "Crap Room." I have started working on it, I swear! Allow me to give you the tour:

IMG_2253 by you.
This is the view when you first walk in. Nice, huh? (Please note the sarcasm.) The only reason there's a path cleared out is because I took down the ironing board and moved my easel into the spot it vacated. Seriously, that's the only reason.

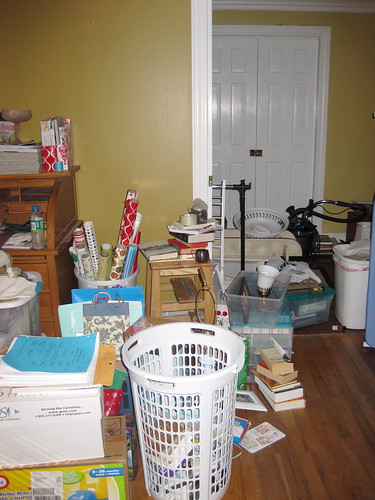
IMG_2255 by you.
View from the opposite side of the room.


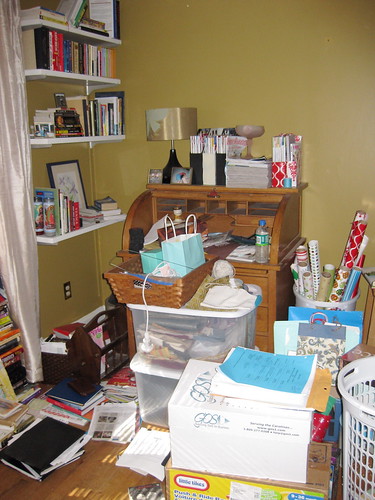
IMG_2254 by you.
I rotated. The rolltop desk belonged to my grandparents (did I mention my whole family stores things in our house? Well, they do. Seeing as we don't actually own the house, I can't really say anything, but still...)

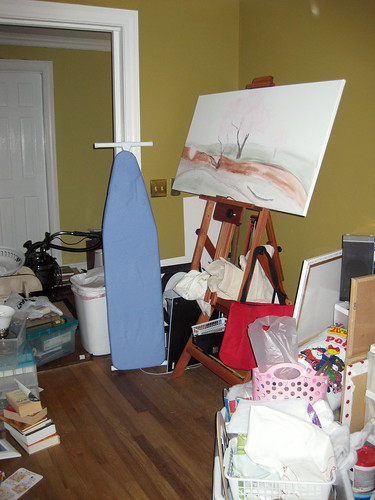
IMG_2256 by you.
My easel and the painting I started in March last year. That's how much time I have to paint. Sad, huh?

craft room by you.
This is a super-sweet montage of mess. That desk was given to me by my grandmother, and it's one of my favorite pieces in the whole house. Too bad you can't see it under all the clutter. Yikes! One of my favorite parts about the room is my "Divining Rod." Really, it's just a curtain rod that I clipped inspirational/favorite images to using curtain rings.


Are you disgusted? Me too. Let's not look at it anymore.

I swear I am working on it. I'll post more pictures as I make more headway. Snarf. I need some pudding.

For fun, here's a Font Quiz that you should take if you're addicted to fonts (seriously, it's sad) like me:


Sara Newton's Fontastic Quiz


Score: 70% (7 out of 10)